How do I set margins, guides and snapping?
Click Page Design, then Margins to pick None, Narrow, Normal or Wide, or type your own. Page Design, then Guides adds column and row guides, and you can drag a ruler guide out of either ruler. Objects snap to the page edges and center, to other objects, and to any guides you can see.
- In Publisher
- Page Design, then Margins and Guides; View, then Rulers
- In Korva
- Page Design, then Margins and Guides; View, then Rulers
Margins and guides are colored lines that help you place things neatly. They never print. Turn them all on or off with View, then Guides.
Set the margins
- On the Page Design tab, click Margins.
- Click a ready-made setting: None, Narrow (0.5 in), Normal (1 in) or Wide (1.5 in). It applies straight away.
- Or type each side under Custom margins (Left, Right, Top, Bottom) and click Apply.
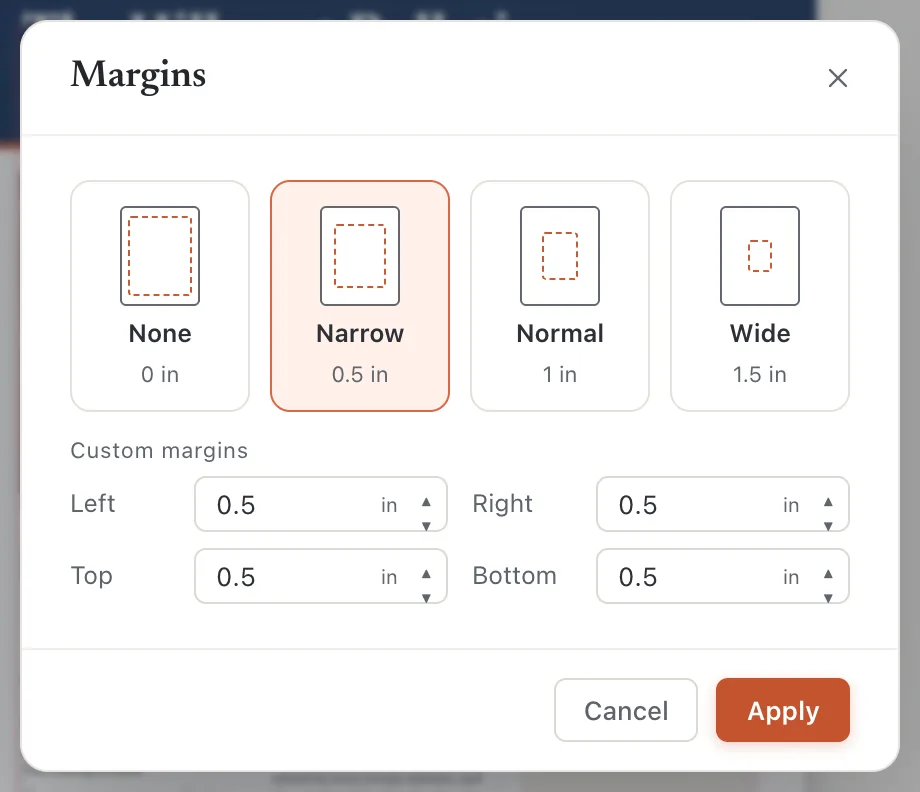
- 1Ready-made margins
- 2Custom margins
- 3Apply
Margins apply to every page. Changing them doesn’t move what’s already on the page; only the margin guides move.
Add column and row guides
- Click Page Design, then Guides.
- In Columns, type how many columns you want the area inside the margins divided into. Do the same for Rows if you need them.
- Baseline (pt) sets the spacing of the baseline grid, which you can show with View, then Baselines (⌘F7Ctrl+F7).
- Click Apply.
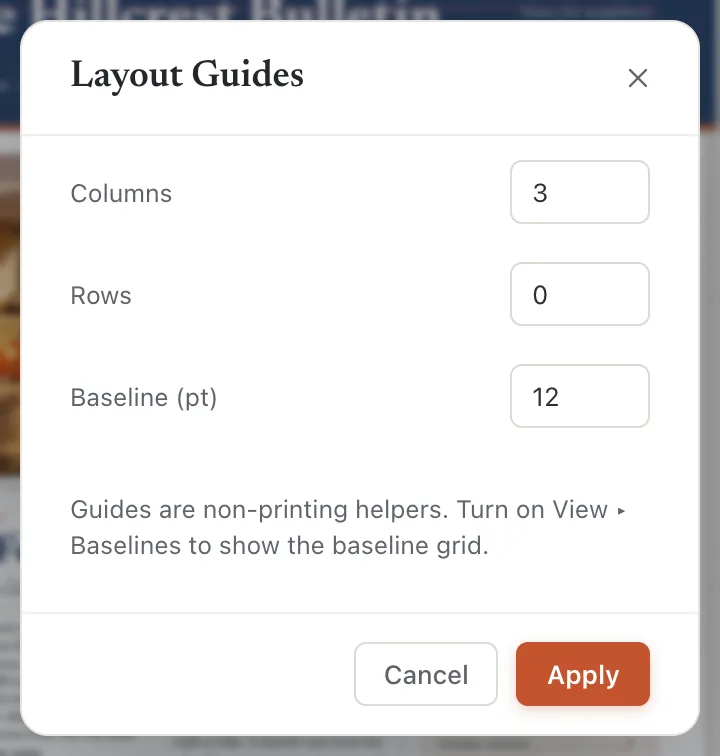
- 1Columns
- 2Rows
- 3Baseline (pt)
Add a ruler guide
- Turn on View, then Rulers if the rulers aren’t showing.
- Drag from the ruler at the top down onto the page for a horizontal guide, or from the ruler on the left onto the page for a vertical guide.
- Let go where you want it. The guide stays on that page.
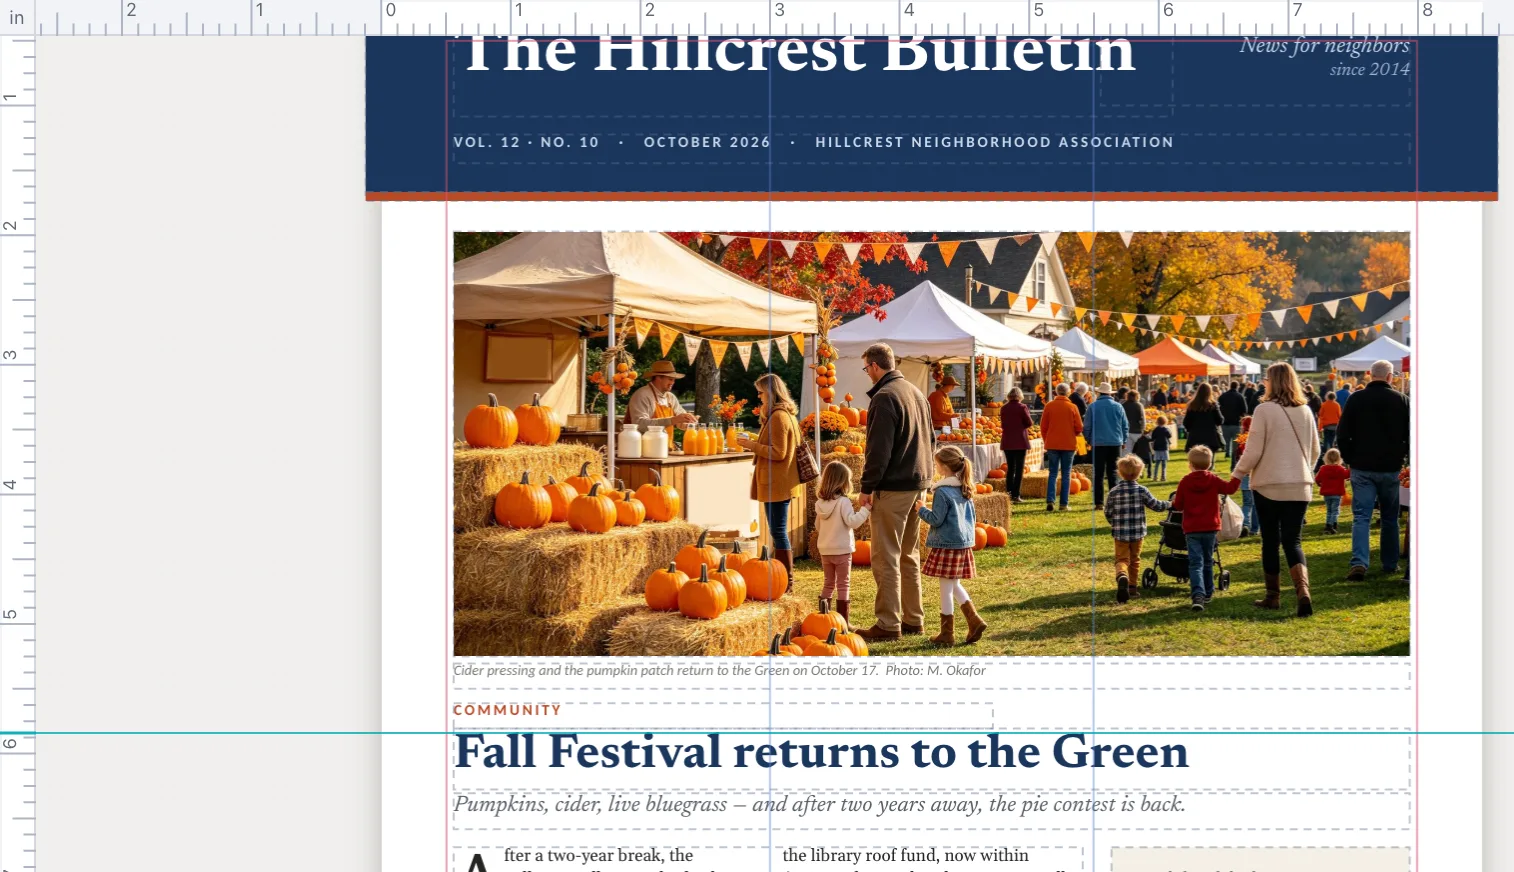
- 1Drag from the ruler
- 2Ruler guide
- 3Column guides
- Move a guide: drag it.
- Remove a guide: drag it back onto the ruler, or right-click it and choose Delete Guide.
- Remove all ruler guides on a page: right-click a guide and choose Clear All Ruler Guides.
How snapping works
When you drag or resize an object, its edges and center snap to:
- the edges and the center of the page,
- the edges and centers of other objects on the page,
- the margins, column and row guides and ruler guides, while guides are shown.
Korva has no setting to switch snapping off. To place something freely:
- Turn off View, then Guides. Objects then stop snapping to margins and guides (they still snap to the page and to other objects).
- Zoom in. Snapping only pulls an object that is within a few pixels on screen, so at a higher zoom it lets go sooner.
- Nudge the object with the arrow keys, or type exact X and Y values under Arrange, then Position & size in the Format pane.
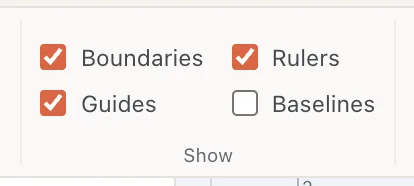
- 1Guides
- 2Rulers
If it still doesn’t work
I can’t see any guides
Turn on View, then Guides. Margins, column, row and ruler guides all hide when it’s off.
Korva says the margins were limited
Margins can take up at most 45% of the page width or height, so there’s always room for content. Choose smaller margins, or a larger page size.
My objects keep jumping to a line
That’s snapping. Turn off View, then Guides, zoom in, or use the arrow keys for small moves.
Something wrong or missing in this article? Email support or open an issue on GitHub.