How do I insert a picture?
Click Insert, then Picture (or Home, then Picture), choose the picture file and click Open. It lands on the page selected, ready to move and resize. You can also drag picture files from your desktop, Finder or File Explorer straight onto the page.
- In Publisher
- Insert, then Pictures
- In Korva
- Insert, then Picture
Korva takes the picture files you already have: JPEG, PNG, GIF, BMP, WebP, SVG, TIFF, AVIF and HEIC. JPEG and PNG pictures go in as they are; other kinds are turned into a PNG copy. Photos from a phone are turned the right way up when they go in.
Insert a picture from a file
- Click the page where the picture should go.
- On the Insert tab, click Picture. The same button is on the Home tab, in the Objects group.
- Your system’s file window opens. Choose the picture and click Open.
- Drag the picture to where you want it, and drag a corner handle to resize it.

- 1Picture
- 2Picture Placeholder
The file window picks one picture at a time. To add several at once, select them in Finder or File Explorer and drag them onto the page together. Each one lands where you drop it.
Fit, flip or swap the picture
Click the picture to select it. The top of the Format pane on the right has the controls you need most:
- Fill frame fills the whole frame with the picture and trims what doesn’t fit.
- Fit inside shows the whole picture inside the frame, with space around it if the shapes differ.
- Zoom enlarges the picture inside its frame.
- Flip H and Flip V mirror it.
- Change… puts a different picture in the same frame, keeping its size, place and border.
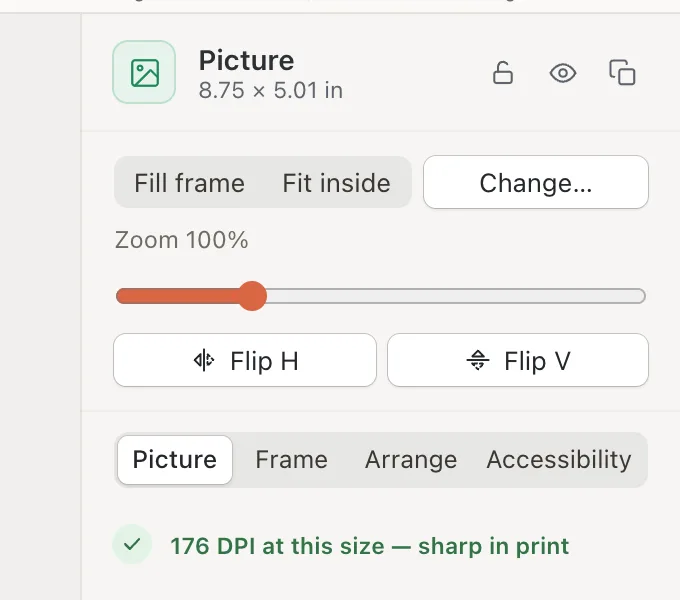
- 1Fill frame
- 2Fit inside
- 3Change…
- 4Print sharpness
Under the Picture tab, Korva tells you how sharp the picture will print, for example 176 DPI at this size — sharp in print. If it says may look soft in print, make the picture smaller on the page or use a larger copy of the photo.
Hold a place for a picture
If you know where a photo goes but don’t have it yet, add an empty frame for it:
- Click Insert, then Picture Placeholder.
- Move and size the placeholder where the picture belongs.
- When the picture is ready, double-click the placeholder (or click Insert picture… in the Format pane) and choose the file. You can also drag a picture file onto the placeholder.
The picture fills the frame and is trimmed to fit, so your layout stays as you planned it.
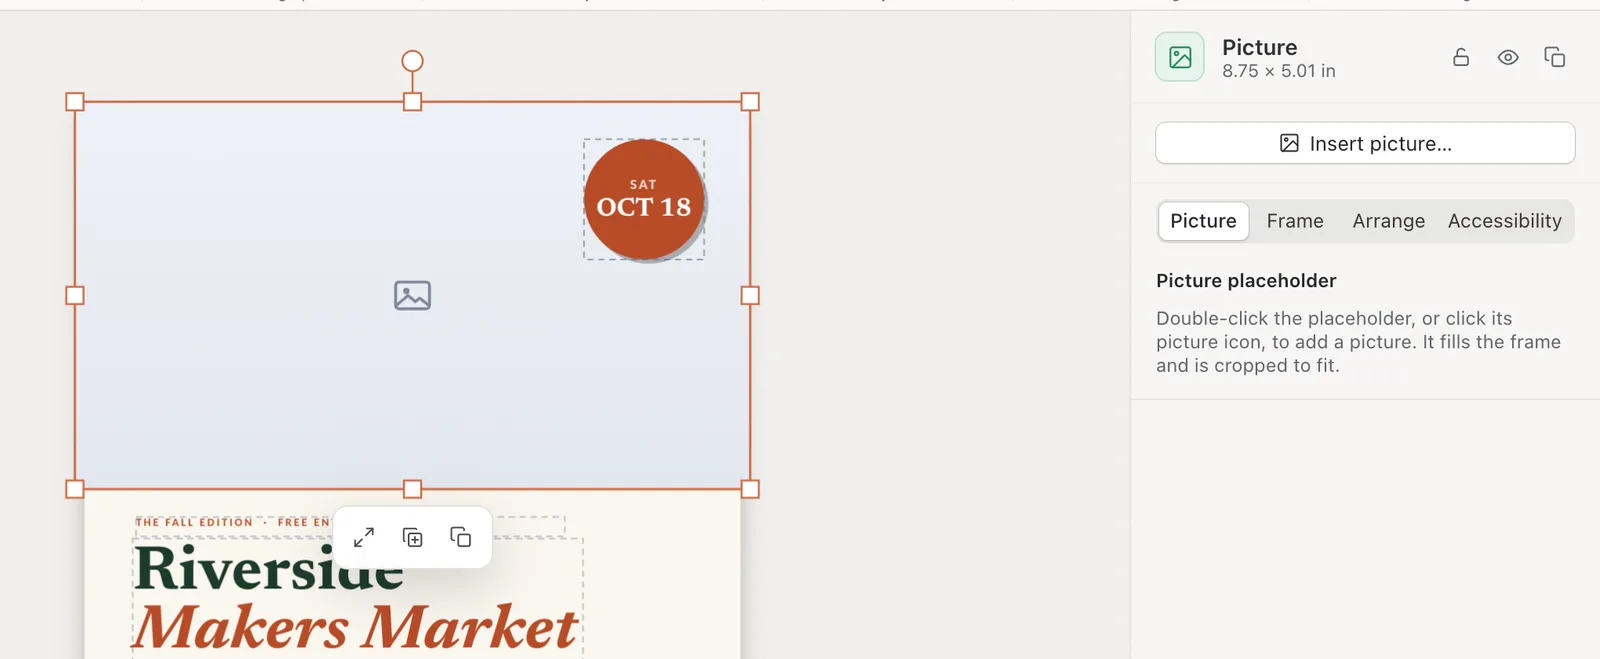
- 1Insert picture…
If it still doesn’t work
Korva says the file is not a picture it can read
The file may be damaged, or in a kind Korva can’t read on this computer (some TIFF and HEIC files). Open it in your photo app, save or export it as JPEG or PNG, and insert that copy.
The picture is blurry when printed
The photo is too small for the space it fills. Check the note under the Picture tab: aim for the green sharp in print message. Use the original photo from your camera or phone rather than one saved from a website or a message. View, then Graphics Manager lists the resolution of every picture in the publication.
The picture covers my text
New pictures sit on top of everything else. Set Wrap Text so the text flows around it (see Wrap text around a picture), or move it behind with Arrange, then Send to Back.
Part of my picture is cut off
Fill frame trims whatever doesn’t match the frame’s shape. Click Fit inside to see the whole picture, or crop it to choose which part shows.
Something wrong or missing in this article? Email support or open an issue on GitHub.