How do I wrap text around a picture?
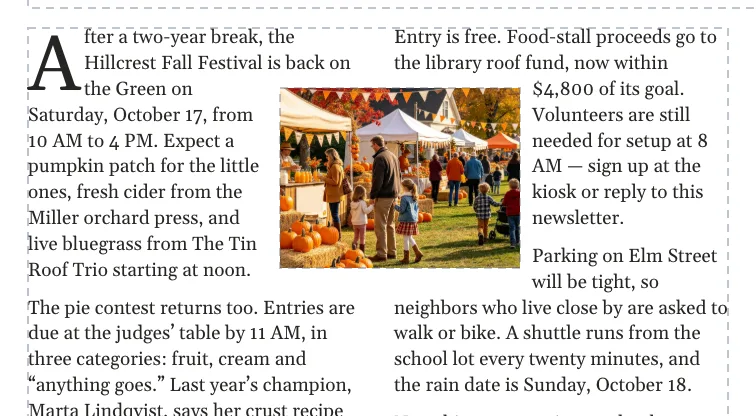
Select the picture, then click Home, then Wrap Text (or Arrange, then Wrap Text) and choose Square. Text in any box underneath now flows around the picture. Choose Tight to follow a shape's outline, or Edit Wrap Points… to draw the outline yourself.
- In Publisher
- Picture Format, then Wrap Text
- In Korva
- Home, then Wrap Text, or Arrange, then Wrap Text
A new picture sits on top of the text and hides it. Wrapping tells the text to move out of the picture’s way. It works the same for pictures, shapes, tables and text boxes placed over a story.
Wrap text around a picture
- Drag the picture onto the text, where you want it to sit.
- With the picture selected, click Wrap Text on the Home tab (it is also on the Arrange tab).
- Choose how the text should flow:
- None: the text ignores the picture and runs underneath it.
- Square: the text flows around the picture’s frame on every side.
- Top and Bottom: the text stops above the picture and carries on below it, leaving the sides empty.
- Tight: the text follows the object’s outline, such as the curve of an oval or the points of a star.
- Through: like Tight, with the text running right up to the outline.
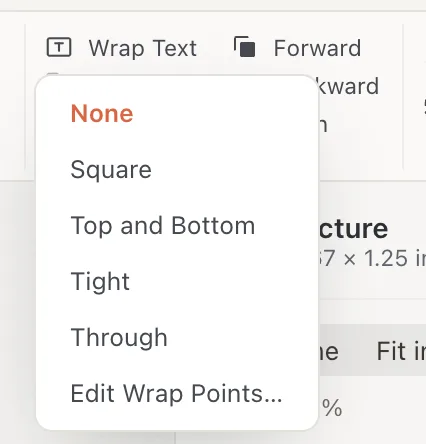
- 1Wrap Text
- 2Square
- 3Edit Wrap Points…
The text reflows straight away. Move the picture and the text follows it.
Shape the wrap outline yourself
For a picture whose subject isn’t a rectangle, draw the outline the text should follow:
- Select the picture and click Wrap Text, then Edit Wrap Points…. The wrap changes to Tight if it wasn’t already.
- Blue diamonds appear around the picture. Drag a diamond to move that point of the outline.
- Double-click an edge between two diamonds to add a point. ⌥Alt-click a diamond to remove it (on a Mac, the ⌥Alt key is ⌥Alt).
- Press escEsc when you’re done.
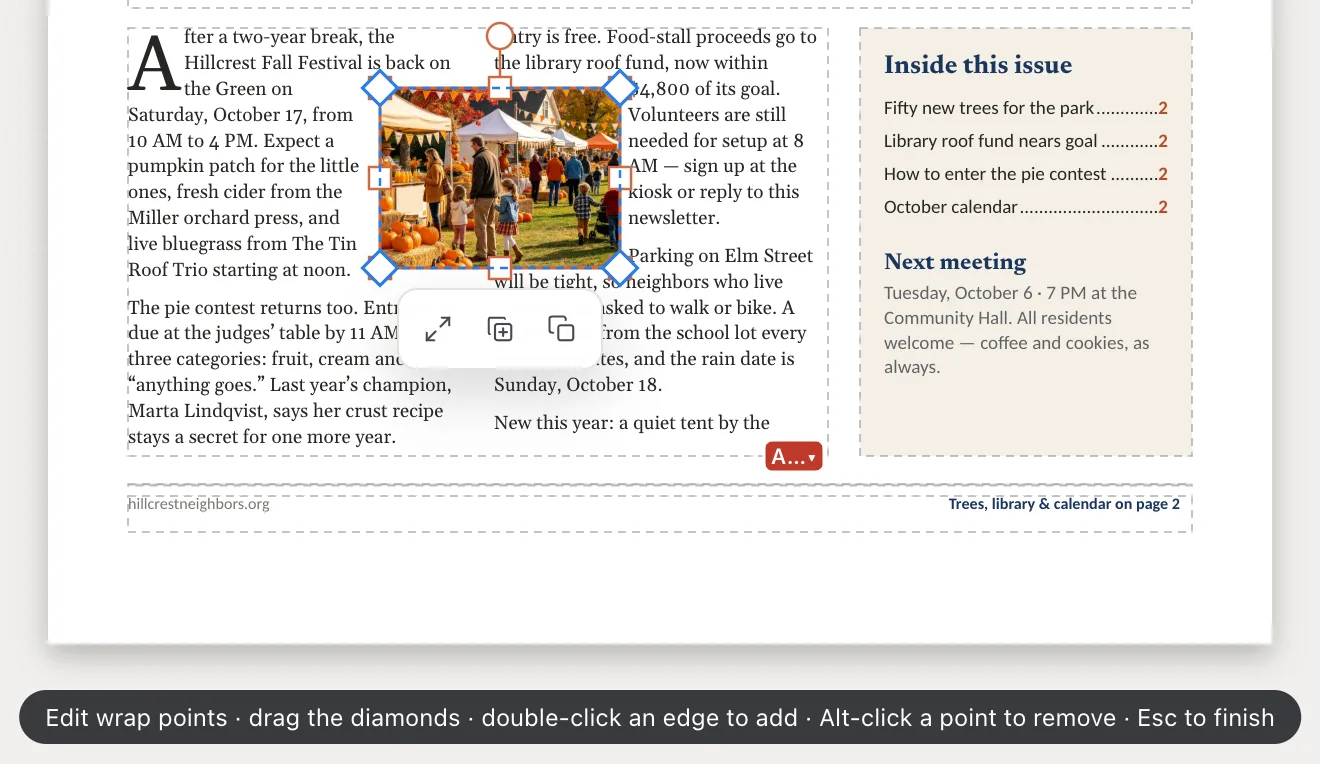
- 1Edit wrap points
If it still doesn’t work
The text doesn’t move out of the way
Check that the picture is on top of the text box, not behind it: select the picture and click Arrange, then Bring to Front. Also check the wrap isn’t set to None.
There’s a big gap between the picture and the text
Square keeps the text out of the whole frame. If the picture has empty space around it, crop it closer, or use Edit Wrap Points… to pull the outline in.
Text disappeared after I added a picture
Wrapping pushes words further down, so the end of the story may no longer fit in its box. A red marker at the bottom of the box means the rest of the text doesn’t fit and won’t print. Make the box bigger, make the picture smaller, or continue the story in another box.
Something wrong or missing in this article? Email support or open an issue on GitHub.