How do I add and format a table?
Click Insert, then Table and drag across the grid to pick the number of rows and columns, then click. Type into the first cell and press ⇥Tab to move to the next one. Select the table to add rows and columns, merge cells or pick an AutoFormat look in the Format pane.
- In Publisher
- Insert, then Table, then Table Design and Layout
- In Korva
- Insert, then Table, then the Format pane
Tables keep lists of dates, names, prices or times lined up. The Sign-up sheet template under File, then New already has one if you want a head start.
Insert a table
- On the Insert tab, click Table. (It is on the Home tab too.)
- Move the pointer over the grid. The caption below it shows the size, for example 4 × 3 table (4 rows, 3 columns).
- Click to insert it.
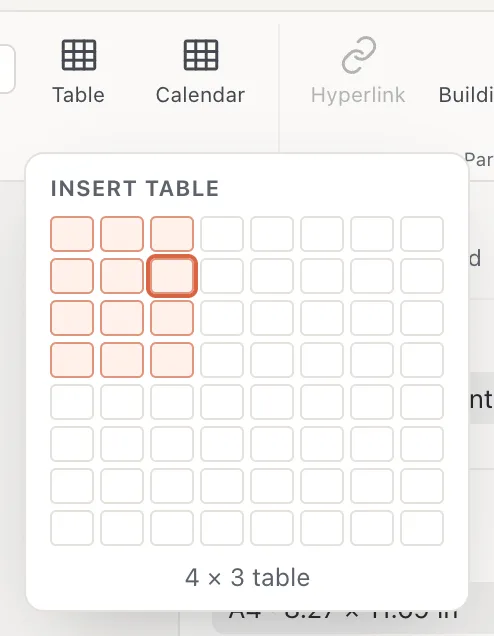
- 1Table
- 24 rows × 3 columns
The grid goes up to 8 × 8. You can add as many rows and columns as you like afterwards.
Type into the table
- Double-click a cell and type.
- Press ⇥Tab to go to the next cell and ⇧⇥Shift+Tab to go back.
- Pressing ⇥Tab in the last cell adds a new row at the bottom.
- Press escEsc when you’re done typing.
To change the font, size or color of the text in the selected cells, use the Home tab or the Text tab of the Format pane.
Add or remove rows and columns
Click a cell, then in the Format pane on the right, under Table, then Rows & columns:
- + Row above and + Row below add a row next to the selected cell.
- + Col left and + Col right add a column.
- − Row and − Column delete the row or column of the selected cell.
- Row height and Column width set exact sizes. You can also drag the lines between rows or columns on the page.
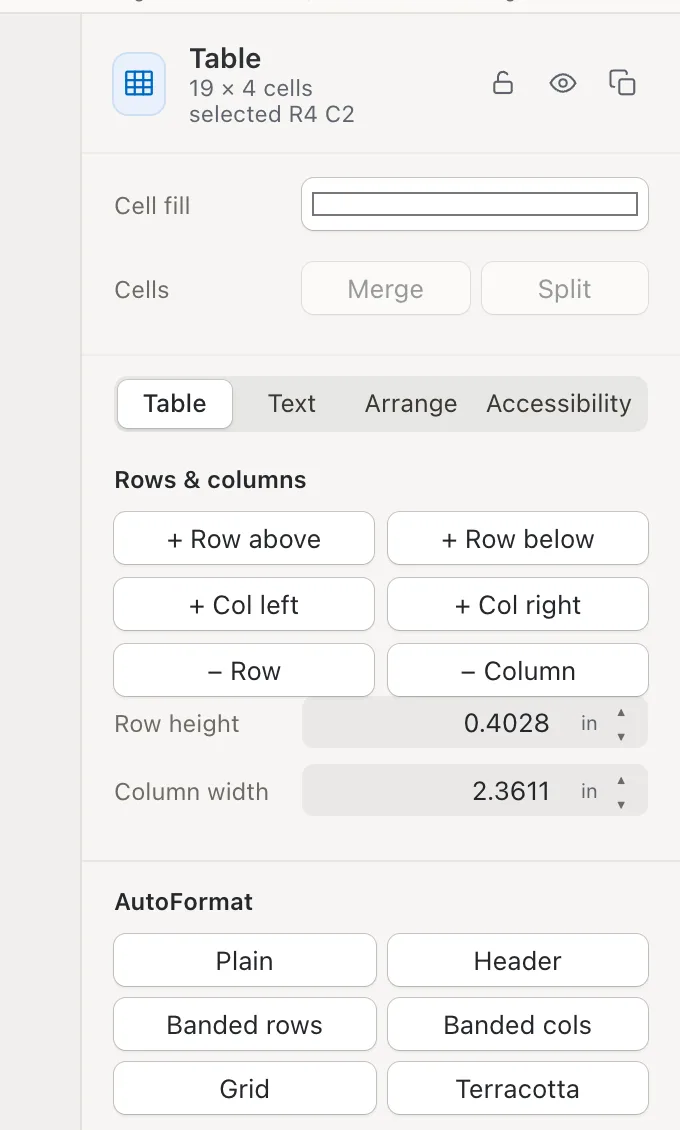
- 1+ Row below
- 2Merge
- 3AutoFormat
You can do the same from the page: right-click a cell and choose Insert (Insert Rows Above, Insert Rows Below, Insert Columns to the Left, Insert Columns to the Right), Delete or Select.
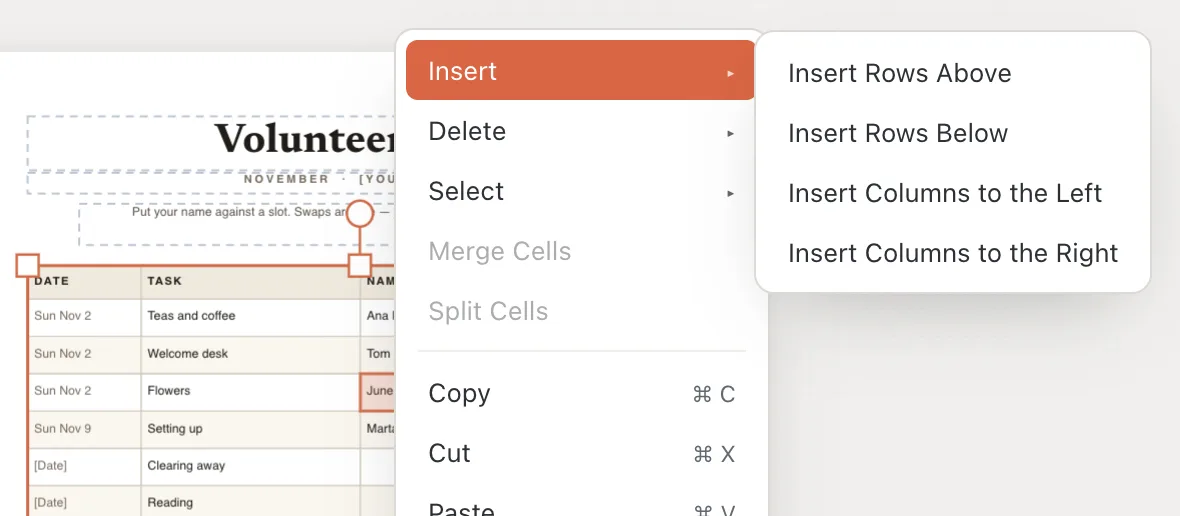
- 1Insert
- 2Merge Cells
Merge cells and change the look
- Merge cells: drag across two or more cells to select them, then click Merge at the top of the Format pane, or right-click and choose Merge Cells. Split (or Split Cells) undoes it.
- AutoFormat: click Plain, Header, Banded rows, Banded cols, Grid or Terracotta to give the whole table a ready-made look.
- Cell fill: color the selected cells.
- Borders: further down the Table tab, pick a color, weight and style, then choose which edges of the selected cells get a border.
- Grow to fit text (under Layout): rows get taller as you type, so text never gets cut off.
If it still doesn’t work
Merge is grayed out
Merging needs at least two cells selected. Drag across the cells on the page first.
Text in a cell is cut off
The row is too short for the text. Turn on Grow to fit text under Layout on the Table tab, or make the row taller with Row height.
I can’t add rows or columns
The table is locked. The Format pane says Unlock this table to change its rows and columns. Right-click the table and choose Unlock.
Something wrong or missing in this article? Email support or open an issue on GitHub.